WSO2 ESB makes use of registry to various ESB artifacts such as sequences, endpoints, local entries etc. This post is about how to create registry resources from WSO2 Developer Studio and deploy it as a CAR file WSO2 ESB.
- First of all Launch WSO2 Developer Studio.
- Go to Developer Studio Dashboard and click on Registry Resources Project.
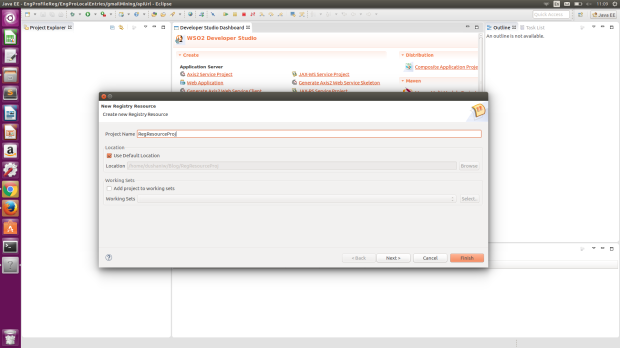
- Right click on the project you have created from the Project Explorer and Select New -> Registry Resource.
- Add resources either from file system, checking out from a registry on server or from an existing template. I have already create a file in local directory called “resource”. Note that the extension of the file is not “.txt”. I have selected to import registry resource from file system.
- Click Next and browse files and select the resource file. Select gov as the Registry and give the registry path to deploy. I have given the deploy path as “custom/testReg/”.
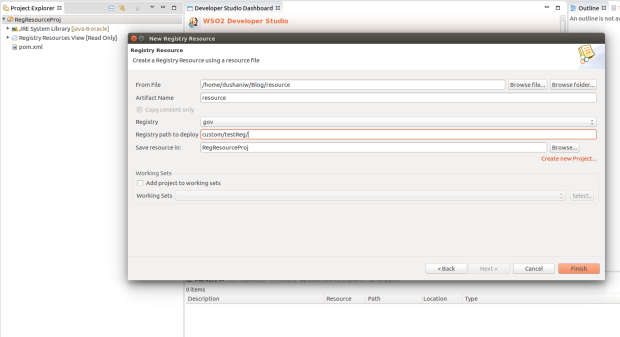
- Click Finish.
The resource value can be changed after.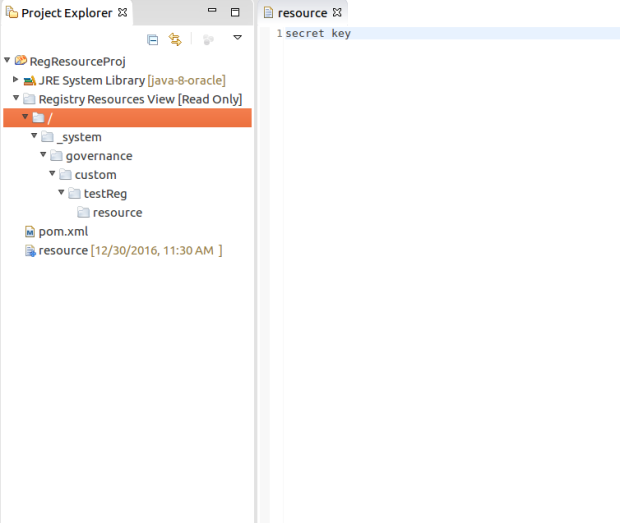
After saving changes to your Registry Resource Project, Go to Developer Dashboard and create a new Composite Application Project. Add the Registry Resource Project as a dependency. If there any other ESB artifact Project, Connector Exporter Project etc in the same work space, select them to add as dependencies.
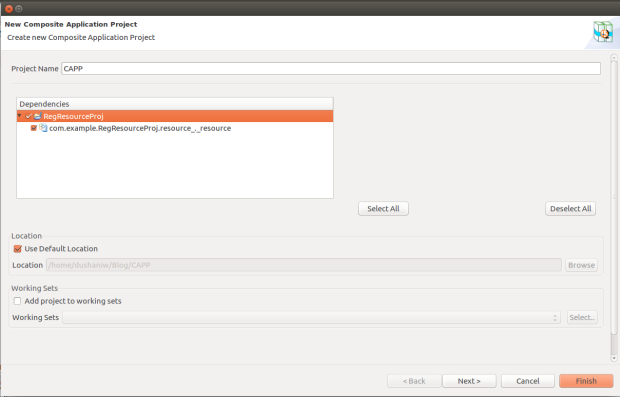
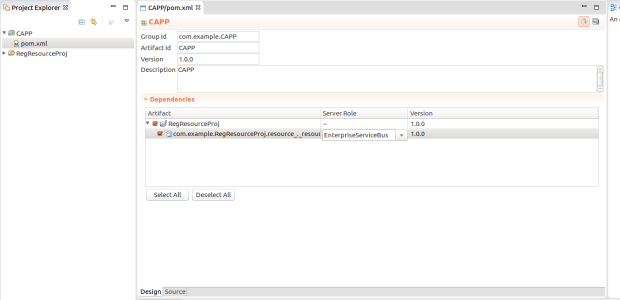
You need to change the registry role to the “EnterpriseServiceBus”. You can change the serve role by editing the POM file of the Carbon Application. Open the pom.xml file of the C-App project with “Carbon Application Pom Editor”. You will see the set of C-App artifacts in your workspace in this editor and you will see the Server Role field in the editor. Expand the name of the Registry Resource Editor and click on the drop down list in Server Role and select EnterpriseServiceBus from the list. Save the Editor and Export the C-App and generate the CAR file.
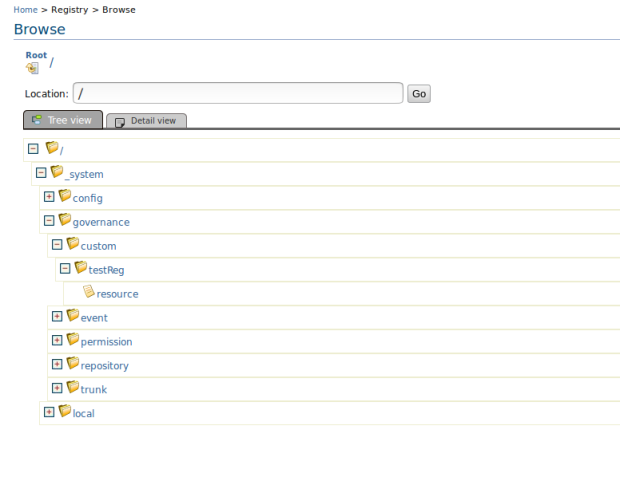
Upload the CAR file to your ESB server instance. The created registry resource can be found in path “/_system/governance/custom/testReg/resource”. Note that if you edit the resource and restart the server the new changes will remain unlike ESB artifacts of a C-App.
The resource value can be access and put into a Property mediator of a sequence as follows.
<property expression=”get-property(‘registry’, ‘custom/testReg/resource’)” name=”registryValue” scope=”default” type=”STRING”/>
Hope you find it helpful 🙂
References :
https://docs.wso2.com/display/ESB490/Working+with+the+Registry
Finally some usefull article about how to use governance , thank you .. everyone missed the spot when you need to CHANGE A ROLE
LikeLiked by 1 person
Thank you. Glad you found it useful
LikeLike